One of the items that I can't live without this semester is my planner! It helps me keep all of my events, tests, homeworks, things I need to do, and basically, my whole life organized. Also, since I made it myself, I feel obligated to use it. It's great!
I got the idea of making my own planner from DIYPlanner, which is a great site that has pre-made templates for your planner and advice on how to get yourself organized. It's really useful, but I have to admit, I don't really understand most of the "Organizing Your Life" articles there. The only thing I really know about "Getting Stuff Done" is that my Gateway (to Engineering...) professor has a system like it where he goes through and deletes all emails that he's read or replied to to keep his inbox uncluttered. Unfortunately, I'm a hoarder, so that method didn't work so well for me...

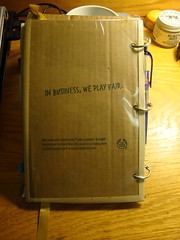
Anyway, it's made from two pieces of cardboard (from The Body Shop, if you didn't notice - they have very beautiful boxes) with plastic over them to keep the water out and to make a makeshift folder for slipping in small pieces of paper, like my schedule. The very pretty border around the cover is actually masking tape... used for taping the sheet protector to the cardboard. The pen loop is also made from masking tape and was used to hold my Signo DX 0.38mm in Purple. I use "was" because the pen holder fell off a couple of days ago. Will have to make a new one... Preferably not from masking tape. The whole planner is held together by two pieces of ribbon, Krazy-Glued to the back cover. The idea was that I could tie the two pieces into a very pretty ribbon to hold the planner closed... except I didn't make the pieces long enough. So, instead, I stuck a piece of velcro to each ribbon and it closes that way. Not very pretty, but hey, it works! In the planner, I have three main sections: Calendar, Research, and Misc. Everything is held together by binder rings for easy removal.
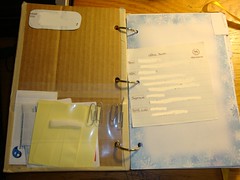
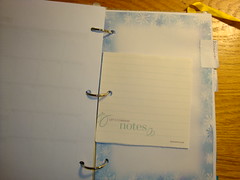
The "first page" of my planner. It includes my contact information in the form of a shipping label, also from the Body Shop box. I also used leftover sheet protector to make a pocket that's uh... also held together by tape. I'm surprised that my planner hasn't fallen apart by now. Also included is a small sheet with the office hours of all of my professors. It's suppose to remind me to study since it's the first thing I see when I open my planner. So far, that plan hasn't worked so well...
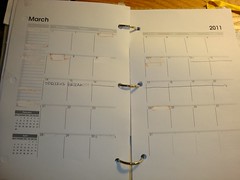
The first page of the Calendar section includes a year view (12 months on one page) and then I have two pages for each month. I write important dates like tests and problem set due dates on the small column on the left. I somewhat color code what I need to do - tests are in orange, quizzes and repeating events are in purple. But nowadays, everything goes. I really like this 2 pages-a-month layout because there's enough room to write in the boxes. My friend complained that she thinks the boxes are too small, but I don't write the problem numbers for homework (none of my classes assign problems from the book - the teachers/TAs always write the problems), so it's fine.
At the end of my Calendar section, I have a couple of small sheets of paper (taken from the Sheraton Hotel where I stayed for the EWB International Conference) that are hole-punched. They have a small cut so that each sheet can be transferred to different places easily without opening the binder clips. They're used for pretty random stuff. I think initially, I planned to use them for homework - I could insert one of them in the middle of the calendar and write the problems I needed to do on them.
After my Calendar section, I have my Research section, where I write down all of the notes/questions I have. It's not pictured because it's just all lined paper, so nothing that interesting. I really like this section because I can keep my notes organized. Before, I used pieces of scrap paper and stuck them in my lab notebook, but I'd have a really hard time finding them afterward. This way, I have everything in the same place and can refer back if needed. Also, the pages are removable, so I can just remove the page with the stuff I need (like ingredients for MES Maintenance Media) and take it with me instead of jotting everything down on a separate piece of paper. The pages are numbered and there's an index in the back, consisting of topics and the pages where they appear for easy reference. The index is really helpful and once I finish my current lab notebook, I plan to implement one there too.
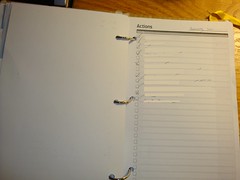
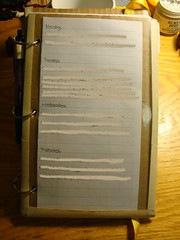
The next section is Misc, where I have my To Do lists, pieces of lined paper, and blank paper. Shown above is a To Do list. I really like this section for the same reason I like my Research section - having everything in one place. I used to use either notepads or post-its for To Do lists and I'd always lose them or start a new To Do list before finishing up the other one, so I'd end up with a million lists. It's great to have to look in only one place to see what I need to do.
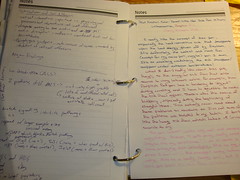
Also in the Misc section, as mentioned above, are lined paper for jotting down random stuff. The illegible handwriting on the left page is what my handwriting looks like when I'm writing quickly and don't have anything to lean the planner against as I write... They're notes for a SURF poster presentation that I went to for Bio extra credit. We had to hand in a photocopy of our notes... Anyway, to the right is something that should look very familiar to followers of my blog - my Pilot Frixion review! I tend to write my pen reviews in my planner because I'm usually writing them when I'm on the go and I like to keep them all in one place. I also have a list of all of my pens there too.
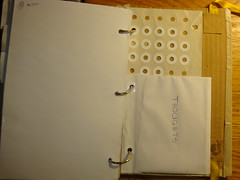
The back page of my planner contains an envelope with small sheets of paper inside. Sometimes when I'm outside, I have a thought about something but don't have my journal to write in. It's really frustrating when I come back to my dorm and couldn't remember that really interesting/annoying/sad/etc thing I wanted to write about. That's where the pieces of paper come in! I can jot down my thoughts and then either reference them or paste them into my journal later on. I also have some reinforcements because every binder ring-bound book needs them! The small cardboard pieces are an attempt to cover up/hold the ribbon in place... Except you can see that some Krazy Glue has leaked through...
All in all, I'm particularly proud of my planner, especially since this is the first crafts project I've done that's not "glue the moon to the sky!" or something. I feel so grown up and inventive! It also didn't take that long and was a lot of fun. If people want, I can also post a tutorial up, but that probably will end up being after midterms (which start next week! I'm avoiding studying for them, if you haven't noticed).
3 comments:
Good for you making something totally personalized - sometimes that makes all the difference!
@Kerrie
Thank you Kerri! It was a really fun project and the end result was very satisfying. =)
i'm planning of making my own DIY planner... and this blog entry gave me an idea how to do it... thanks! i'll follow you now...
you can also check my blog:
www.niqueinit.blogspot.com
NIQUE
Post a Comment